Today, we ran Box’s paper helicopter experimental design example at the Science Street Fair sponsored by the NZ Association of Scientists and hosted by the Museum of Transport and Technology.
It went fairly well. In particular, the younger kids really liked dropping paper helicopters and comparing different designs and we got in a few useful discussions of experimental design with adults – mostly school teachers.
Things to note:
- Use a photocopier and pre-printed design template, such as the one from the SixSigma package for R
- This lets you also produce a 2-up version, giving an extra interesting design factor. The little copters are easier for kids to drop.
- Having five or six experimental factors and a or design makes it easier to motivate a good structured design
- Let the kids drop the helicopters, and time the flight, but don’t use that data in modelling.
- The kids like being given copters or paper templates to take home.
- For the good data, it’s important that the drop height is standardised, and is as high as practicable. An adult standing on a chair is (barely) enough.
- For timing, have the person dropping the copter count 3,2,1,drop and the person with the timer watching the floor where it will land.
- It’s worth doing each drop twice and using the average as the measurement, because that’s easy.
- You need at least two and probably three people to run things.
- You can do most of the cutting ahead of time or in quiet periods
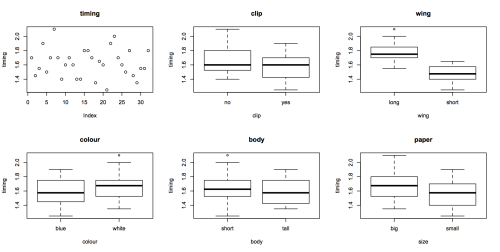
- Enter the data as you go, so you can show boxplots for each factor.
Our experimental factors were height, wing length, paper type, size (A4 vs A5), and paperclip or not. The paperclip and size are interesting because they have a big effect on how the flight looks, but not a big effect on the flight time.

Things to avoid
- getting absolutely drenched by unexpected rain on the way to the event
- doing it with a bad cold.